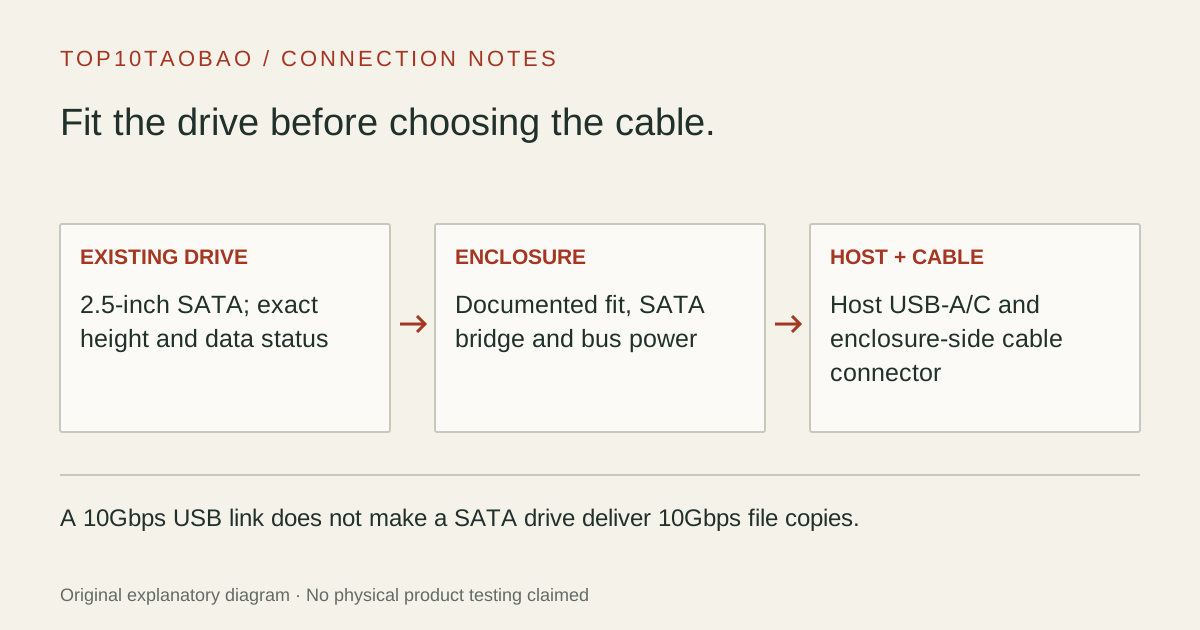
Reuse the drive you actually own. A 2.5-inch SATA SSD needs a matching physical enclosure and host cable; an M.2 NVMe box is a different product even when both advertise USB-C and 10Gbps.
By Top10Taobao Editorial · Sources checked November 5, 2026 · US edition
01 / CHECK THE COMPLETE SETUP
Start with the requirement.
Read the drive label and manufacturer specification before opening a computer: 2.5-inch SATA, physical height, and existing data status. Then match the enclosure’s stated fit and cable to the computer. Do not initialize or format an existing drive just because a new enclosure makes it appear unfamiliar.
Do not substitute a similar product name or a different regional package. The sources linked under each entry support the named model and its stated conditions.
Original explanatory diagram; not a product photograph or tested wiring configuration.
02 / THE COMPARISON
Read the limit beside the headline.
Scroll the table horizontally on a small screen. Limits are manufacturer claims, not measurements. Ask the maker about a condition that is decisive and still unknown.
Exact models and documented restrictions; prices and live stock omitted
A taller supported 2.5-inch SATA drive, or one case that must connect to both USB-A and USB-C computers with supplied leads.
Skip it when
You need a 3.5-inch drive, an M.2 module, or assume a larger case guarantees enough power from every hub. Check drive power demand and the complete USB path.
Confirm 2.5-inch SATA and drive height. Choose a documented USB-C connection arrangement rather than buying an M.2 box because the new computer has USB-C.
A 15mm 2.5-inch drive
Reject a 9.5mm maximum enclosure even if the SATA connector matches. Compare the taller model’s fit and drive power needs before buying.
An existing drive is detected but files are missing
Stop before accepting an initialize/erase prompt. Confirm encryption, filesystem and the original data status; do not make a purchase guide into an automatic recovery or formatting procedure.
05 / EVIDENCE & SCOPE
What the comparison establishes.
This focused comparison uses three well-documented StarTech arrangements: detachable USB-A host cable, integrated USB-C cable, and a taller case with both host leads. It is not a cross-brand winner claim. There are no measured transfer, temperature, endurance, recovery or data-integrity results.
Each entry has an original fit explanation, an exclusion and an alternative. We selected the models for distinct documented arrangements rather than copying another publication's order. Unknown fields are not filled by estimates, and manufacturer marketing measurements are not relabeled as independent tests.
Identify the drive before choosing the interface speed
Physical family check
Drive in hand
This page applies?
Next step
2.5-inch SATA SSD/HDD
Yes, if the exact height and power requirements fit
Read the drive label and enclosure fit range
M.2 SATA module
No
Choose a matching M.2 SATA enclosure, not a 2.5-inch case
M.2 NVMe module
No
Use the NVMe enclosure comparison and confirm module length
3.5-inch desktop SATA drive
No
Use a matching powered enclosure or dock; this table is for 2.5-inch products
SATA describes a protocol/interface family; 2.5-inch and M.2 describe different physical arrangements. Matching the letters “SATA” is not enough to make an M.2 module fit a 2.5-inch connector. The NVMe versus SATA enclosure guide separates those decisions.
A 10Gbps USB bridge does not turn SATA into 10Gbps storage
The listed USB link is up to 10Gbps, while these SATA III paths are up to 6Gbps before protocol overhead. Actual file copies also depend on the SSD, host controller, filesystem, file sizes and other devices. We do not convert these interface rates into a promised MB/s benchmark.
UASP support is a documented feature, not a measured speed result. Similarly, a TRIM entry does not prove that your OS, bridge firmware and complete connection route will use it. Keep the drive and enclosure firmware identities when asking a manufacturer about a requirement.
USB bus power is part of the connection plan. A USB-C plug does not itself establish how much power the host port or intermediate hub will supply. If a drive repeatedly disconnects, check a direct known-good data/power path and the drive’s own specification before treating a speed label as the cause.
Keep an existing drive’s data status separate from initial setup
The manufacturer’s installation manual distinguishes an existing drive from a new blank drive and warns that preparation can delete data. This guide provides no automatic erase, initialize, partition or format steps. If the drive already contains files, verify a separate backup and the original filesystem or encryption requirements first.
Record the exact drive model, height and whether it contains the only copy of any files.
Install and connect it according to the selected enclosure’s manual, without forcing the SATA connector or case.
If an OS proposes initialization or formatting unexpectedly, cancel while you establish whether the drive is new, locked, unsupported or damaged.
For a readable drive, verify ordinary access before moving files. Finish writes and use the OS removal/eject process before disconnecting.
Treat repeated disconnects, unreadable existing data or unexplained capacity changes as a diagnosis task; do not keep changing the disk layout.
Choose the physical fit, then the host cable
Choose the detachable USB-A model for that host route, the integrated USB-C model for a short direct connection, or the taller case for its documented height range and two cable options. Exact product and package revision still matter; the same brand’s other SATA enclosures may use different sockets.